It seems to me that speed and quality of the Fujifim X-Pro 1 autofocus is one of the hottest topics about this camera on the web. "Is it as fast as...?" "Is it capable of sports, action, etc...?"
I will focus (no pun intended) on this topic for todays post and give you my experiences and tips on how to get the most out of the X-Pro 1 in terms of focusing. As of today, I took more than 10,000 images with the X-Pro 1 in the past 4 month. That gives me a pretty good idea of what the AF can and what it can't do.
The X-Pro 1 AF will not rival the speed of the Nikon D4 or Canon 1D X - that should not be a surprise to anyone. But there are ways to make the AF of the X-Pro 1 perform fast enough for most situations.
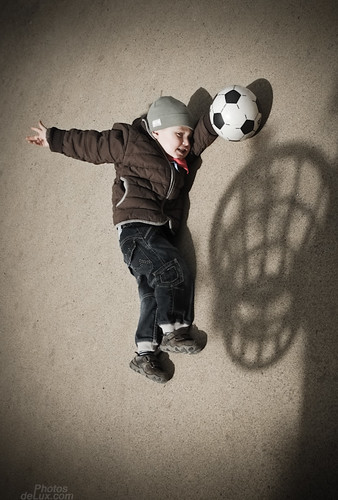
No, you don't have to fake it like this in order to take photos of moving subject with the X-Pro 1 ;)
The X-Pro 1 uses contrast detection autofocus (CDAF) compared to phase detection autofocus that is usually found in DSLR cameras. As I have
, I like to photograph at minimum aperture to create a shallow depth of field. And in those situations perfect AF lock is essential for good results. The advantage of contrast detection is, that it is very accurate when it locks onto the target. On my phase detection DSLR camera I have gotten used to pushing the shutter half way for 2-3 times before I trust that the AF locked correctly onto the subject.
You can give this a try for yourself. Take your DSLR and your fastest lens - a 50mm lens with f/1.8 or faster would work great. Then open the aperture all the way and look for a subject about 1 m (3ft) away. Now press you shutter (or designated AF button) once untill you get the focus lock feedback. Now do it again. Did you hear the AF in the lens moving (pumping)? And give it a third try. Still hear movement? If so you are hearing the lens readjusting every time.
I found that in those situations the contrast autofocus is usually spot on the first time while the phase detection AF needs a few pushes and a series of images to get a perfect result.
The advantage of phase detection AF is, that it is better at tracking subjects, especially if they move towards or away from you. The continious contrast detection AF on the X-Pro 1 did not yield good results for me when set to AF-C (continuous) mode.
So is the X-Pro 1 useless for moving subjects? Not at all! You just have to approach things differently to get good results! Here are my tips to get the best results from the X-Pro 1:
1. Learn what the X-Pro 1 AF needs:
Although the X-Pro 1 will generally focus without a problem in good light, there are situations where you need to aid the AF to lock onto your subject. These situations could be a very low contrast object like a plain wall, low light or backlight behind your subject.
In those situations you need to remember that the contrast autofocus of the X-Pro 1 does not focus like a cross type sensor. Think of the AF to work like a split screen focusing screen on a classic SLR camera. Therefore you should aid the X-Pro in horizontal orientation (landscape orientation) to find a vertical line on the subject for your AF point to focus on. In vertical orientation (portrait orientation) look for a horizontal line to focus on. It took me some time to figure this out, but you can give it a try on your white bathroom tiles as a hands on exercise to remember this.
There are situations where you might not find the edge or line in the correct orientation for the focus frame to aim at. In those situations I keep the viewfinder on my eye, tilt the camera slightly (maybe 25° clockwise or counterclockwise) an half press the shutter untill I get the focus lock confirmation. I keep the shutter half pressed, turn the camera back into the orientation that I desire, reframe and click!
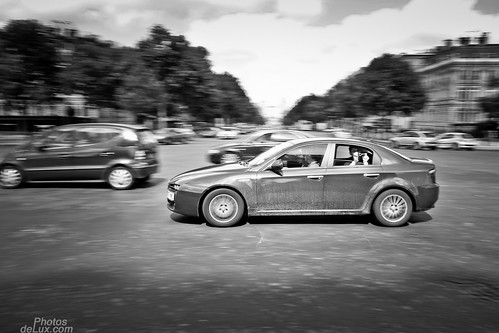
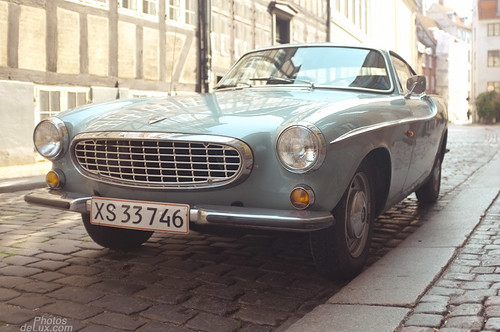
This car was driving parallel to me and the AF of the X-Pro 1 did not have any problems to lock focus on the first try
2. Focus points are your friends:
Choosing you focus point is critical. In electronic viewfinder mode (EVF) I set my focus point (focus frame) to its smallest size (push the AF button and turn command dial to the right). This way I reduce the potential for focus error in situations where the focus point covers too much of a subject. How annoying would it be if you focus at an eye, but the AF chooses the nose as it happens to be in your focus area, too?
A larger focus point will however increase the chance that it can focus on something in critical focus situations as described in 1. above. So there might be situations where it can be helpful to increase the size of your focus point.
You should also get very comfortable to use focus point selection. I get far better results when I select the focus point to be on the correct spot in the frame compared to focus and recompose - especially with the XF 18mm lens. I tend to get really close to my subject with the 18mm lens to get a shallow depth of field. And during the focus and recompose process a few centimeters movement can ruin the focus. So get that muscle memory in your fingers trained to press the AF button once and then select the focus area on the arrow buttons. When you want to quickly recenter the AF point afterwards, just push the AF button once and then click the "OK" button in the mittle of the arrow keys - voilá :)

The best way to get this sharp result was to set the focus point to the top right of the frame onto the keyhole
3. Focus speed - Yes, it can!
Like I said in my introduction, the X-Pro 1 AF will not be your best choice if you want to use AF-Traking for fast action photography. However, I found the focus speed to be much better than I expected. But once again, you'll probably have to operate the AF differently to what you are used to.
To archieve the fastest AF speed on the X-Pro 1 set the AF to AF-S (single) and turn the power save mode off. Then adjust your focus point to be on the area of the frame where you want to lock focus on (if you constatntly don't get good results try to increase the AF point size for that situation). Now aim at your subject and quickly press the shutter all the way. Yes, you press it all the way without waiting for half press focus confirmation! It took me some time to learn this approach as I have done it
properly
differently for the past 8 years. But change is good if the results improve. Give it a try, you will probably be surprised :)
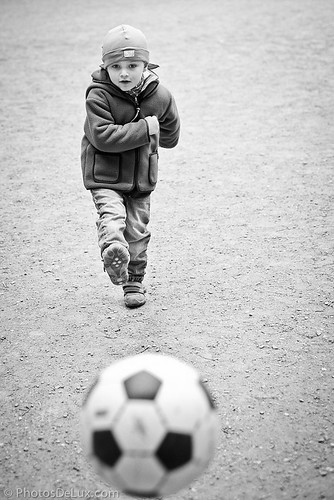
Contrary to
I found that the X-Pro 1 is suitable for kids soccer photography ;)
4. Fast action sports - Yes, you can!
There are however limits to what the X-Pro 1 AF can handle. Once you are getting into really fast or close action it is up to you! Kind of "Don't ask what your camera can do for you. Ask instead what you....." you get the idea ;)
Once you reach the limit of AF speed, and that is the case for any camera, you will have to rely on your own skill to capture the action. Believe it or not, before AF was invented photographers took fantastic action photos, too. The secret for good results is to lern how to manual zone focus.
First, you will need to anticipate the area of the scene where the action will take place and switch the focus mode to Manual. Secondly, prefocus to the spot where you want to capture the action and stop the lens down to an f-stop that allows for enought depth of field (zone) where the subject will be in focus. The manual focus distance scale indicator in the viewfinder will show this depth of field zone (white line) in front and behind your focus distance indicator (red line).
Finally, you only need to set your minimum shutter speed to either freeze the action or to leave a bit of motion blur. Now let the subject walk (or run) into your zone of focus.

Zone focusing the X-Pro 1 with 35mm at f/2.8 was the only way to get a good image this close to the action
5. EVF or OVF for best results?
To get the most accurat framing and focus spot you are best off by using the EVF. And for manual focus and macro photography the EVF is pretty much your only choice. I also prefer the EVF in dark situations as it amplifies the scene and makes it much brighter than in the OVF! Yet, some people don't like to use EVF as there is a bit of lag and the refreshrate can be too slow for some situations. But as you have probably guessed by now, there is also a trick to overcome the EVF display lag in critical timing situations.This will work best if you are photographing with your right eye on the viewfinder. We can take advantage of the X-Pro 1 rangefinder style layout by framing and pre focusing our shot with the right eye on the EVF and then opening the left eye, too in order to look "live" at your subject. Now you see the live "feed" of the scene with your left eye a bit faster than the scene through the EVF. And this can give you the critical edge in timing that smile you want to capture or simply avoiding closed eyes due to blinking of your subject. It takes a bit of practice to get used to it, but it works really well for me. For people who look through the viewfinder with their left eye this trick will only work in portrait orientation.
Naturally, you don't have the lag issue with the OVF. Due to the bigger field of view compared to the actual frame lines the lens/sensor combination captures, you can also better anticipate a subject before it walks into your capture frame. The drawback of the OVF is parallax error. As you are not looking through your lens like you would in a (D)SLR or EVF style camera, you need to compensate for the difference in position from your eye to your lens. This parallax error gets bigger, the closer you are to the subject!
The X-Pro 1 offers a setting in the menu (switch Corrected AF Frame to "ON") to show an estimation of the focus point and framelines shift according to the distance the AF measured. The adjusted focus point and framelines will appear after you half press the shutter to focus and then recompose to adjust the framing. Note that you can't reduce the size of the AF point in OVF mode (it would not be accurate enough). You can however move the focus point around.
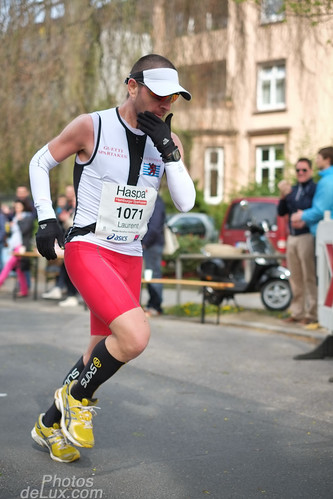
I looked with my left eye past the camera to time this photo and with my right eye through the EVF for general framing. If I would have relied only on the EVF for timing, the lag would have caused me to push the shutter a fraction of a second too late.
Conclusion:
There are certainly limits to what the X-Pro 1 AF can do, but I find the performance of the AF and MF to be very usable. I sometimes read that people (probably not so experienced photographers) are unhappy with the AF performance of the X-Pro 1. But you'll have to do some things differently than what you might be used to in order to get the best results with this camera. There is no face detection or object tracking on the X-Pro 1 - so if this is what you have been used to in your previous camera you now have the perfect opportunity to learn more photography techniques that will put
you
in charge of the results. Try it, it can be very rewarding. After all, who likes to be only on the passenger seat all the time? ;-)

A friendly Sony NEX-5n photographer wanted to return the favor and take a photo of me with my X-Pro 1. I guess he never photographed without face detection AF before ;)
Click on the image to read the whole story on this unsharp photo.
If you have any further questions leave a comment below or Twitter me @HamburgCam
p.s. Most of these tipps will also work on the Fuji X100 and Fuji X-E1
And if you liked my post I am always happy if you spread the word and retweet, like or google +1 it :-)


